
Yes, you get to deal with my art skills again today. I haven't posted a tutorial in a good long while, so I figured I might as well put one together for you guys.
I will warn you ahead of time. My style has changed a bit since the last time I posted a tutorial, and I'm not sure if it qualifies as manga anymore. It's mostly just Catsi-style now.
On to today's topic: Hairstyles.
Or, to be more specific, Hairstyles that Define Character. "Character" being personality, in this instance. Something I tend to do when designing a character is just throw on the first hairstyle that comes to mind. While this does work sometimes, most of the time putting a bit of thought into how your character's hair looks will help whoever is looking at the drawing later know what personality that character has--just from a headshot!
Obviously, facial expression, pose, etc., are also helpful in conveying expression. But don't underestimate the power of a hairstyle.
(On a drawing. Forget hairstyles in real life--I'm too
 |
| Step One - A face. Or three. |
Yes. Lucky you gets three tutorials in one. I felt like further demonstrating how a hairstyle determines character, so I decided to draw three different examples.
Take your time with this step. If you're not confident in your blank-face drawing abilities, google a tutorial specifically on that. Or if you really, really want to, you can use the one I did last year on the subject.
Once you've got your basic face, and some rough guidelines to place your features later on, you can move on to the next step.
 |
| Step Two - Hairline. |
Here is the first part of determining character. There are all sorts of different hairlines and parts. They can be straighter, pointed, even... Have fun with it! Put the part wherever you want. (Poppy's part is straight down the center, so it kind of merges with the guidelines.)
Annie's part has a line going perpendicular to the rest of it, because her hair will eventually be in a braid. The hair that's not a part of her bangs goes straight back, although it will still slightly follow the part line.
 |
| Step Three - Add front part of hair. |
This step looks a little messy, because there are a lot of lines on a small drawing. Go ahead and zoom in a bit to get a better idea of where they're all coming from.
Basically, start at the part or hairlines, and start adding the hair in. Now is the time to choose whether the hair is straight, curly, or wavy; pick the one that shows your character's personality best. The bang style will also show personality.
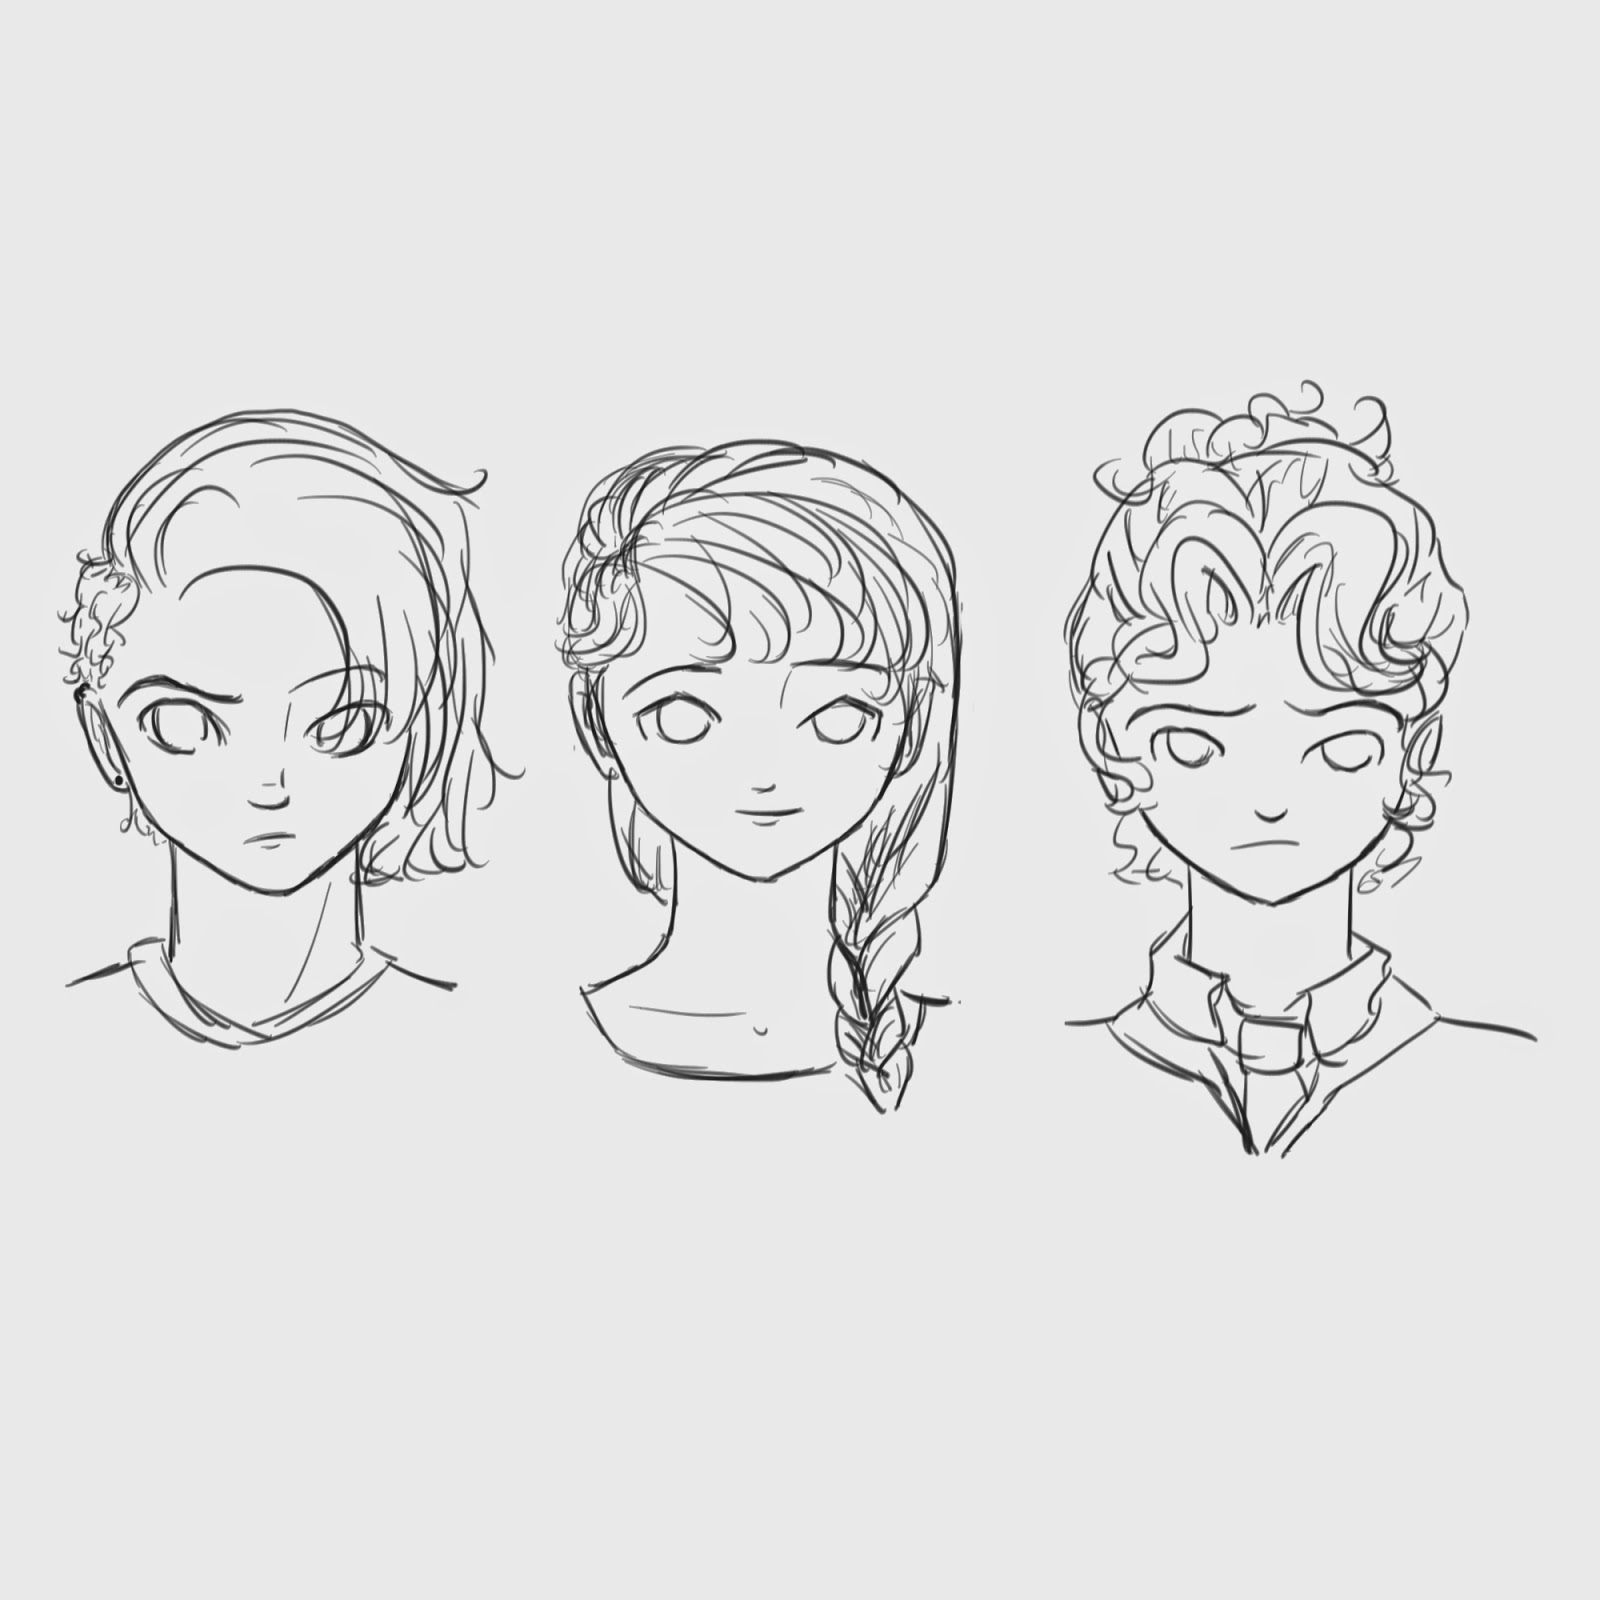
(See how this is all coming together already? Rachael is obviously a more spunky, walk-to-my-own-beat person, Annie looks prim and proper, and Poppy just looks like she ran her fingers through her hair and called it a day.)
 |
| Step Four - Add the rest of the hair. I also gave them necks, because floating heads look really creepy at this point. |
Now you get to decide where the rest of the hair is going. Is it long, short, or somewhere in the middle? Does she prefer it loose, or thrown back into a ponytail, or does she spend a lot of time putting it into some elaborate hairstyle? Or maybe she has someone to do it for her...
(If you have a royal character, this is the time to really have fun with the hairstyle. Delicate braids, curls and beads, and anything else that strikes your fancy!)
 |
| Step Five - Add details. |
I was also getting severely irritated by the fact that the faces were lopsided, so I cleaned that up in this picture as well.
 |
| Step Six - Clean up the lines and ink! |
I'm not done coloring them yet, otherwise I'd post that as well. Maybe I'll save it for a coloring tutorial sometime...
Any questions? Comments? I'd love to hear from you! And I'd also love to see your art. Post a link to your blog in the comments, or if you'd rather, email me the picture at windowtothesoulcontests[at]gmail.com. I love seeing what you guys come up with! :)
We have an art contest open for submissions, see the guidelines here.
That's really helpful! Thanks! :)
ReplyDeleteYou're very welcome! I'm glad you found it helpful.
Delete